
| Tool command | |
| Menu command | Main menu > Print settings |
In Print settings you make general settings for your prints. Open the window with the above command.
All print settings are linked to a template that you connect to a report and control how your prints look. Pdf printouts that are not reports use the last saved templates pdf settings. You can make as many templates as you want but they must have a unique name.

Reset restores the active template to default values, Delete delete the template and Change name, change the name of the template.
Import and Export allows the user to add and share your templates.
 There are standard templates that you can not rename or delete.
Under the category Selection, you can exclude people from your print based on time, number of generations or if persons or facts are private.
| Exclude private facts | Omits facts marked as private, from the report. |
| Exclude private persons | Omits persons marked as private, from the report. |
| Exclude persons born after [date] | Omits people, who were born after the date specified, from the report. |
| Exclude persons dead after [date] | Omits people who are dead after the date specified, from the report. |
| Exclude facts occurred after [date] | Omits facts that occur after the date specified, from the report. |
References specifies which kinds of references you want to the person.
| Generation numbering | Prints generation numbers in the report. |
| Ancestor numbering | Print ancestor numbers in the report. Learn more about System for ancestors. |
| Ancestor signs | Prints signs for relations in the report. For ancestors m, mf, mf f etc. and descendants 1, 1.1, 1.2, 1.1.1 etc. |
| Reference for pedigree collapse | Prints a reference if there is an pedigree collapse otherwise the content is repeated. |
| Show age for facts | Prints age in brackets for the person when an event occured |
Media, where you specify the default size of your images when printing.
Have you set a different size for your image in
Media it will use that size.
In Source placement you specify how you want your sources and citations to be presented. Either Harvard system or Oxford system.
Selection, where you can specify what information to include.
The selection applies to the main person. The other groups that share the same setting is selected after selection the label with the initials. M=main person, P=parents, S=spouses, SP=spouse parent, C=children, CS=child's spouse, F=Family.
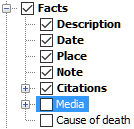
Displays Content for persons and family where you can specify the content of the family and different individual types: main person, parents, children, etc. There are two tabs for each type: Tasks where you choose what to include by checking areas of the tree structure and Facts where you choose which fact types to be included.
Paragraph, where you can change the paragraph formatting.
Language, where you select the language to be used for printing.
You can choose whether you want the name to be presented with the first name or last name first under Name order.
Fonts and lists, where you change fonts and appearence of bullet lists.

Contents of sources where you specify which information to include with your sources and your repositories.
Please note that the content of Citations
is made in Contents for persons and families, see Advanced selection.
Here you make settings for the title, header, footer, registers, your self, pdf and print language.
Title, where you can choose if want to have a title, what the title should contain and what font it should have. In the box for the title are a number of predefined values, but you can also enter your own. You can either enter the text you want to present or use the aliases available. Alias is words that begin and end with the percent sign and represent different dynamic values.
The aliases for title are
| %REPORT_TYPE% | is replaced with the name of the report type eg Personal file. |
| %NAME% | is replaced with the name of the main person. |
| %NAME_REVERSE% | is replaced with the name of the main person with the last name first. |
| %BIRTH_yyyy% | is replaced with year of birth. |
| %DEATH_yyyy% | is replaced with year of death. |
| %BIRTH_d mmm yyyy% | is replaced with birth date. |
It is not the alias is printed as it is. The following, for example, would be:

Personal file for Anders Svensson (1789−1833)
In Headers and footers, you select if headers and footers should be displayed, what font to use and what is shown in the left, center and right columns.
In the same manner as for the title, you can use aliases to specify header and footer. The aliases available for headers and footers are:
| %DATE% | is replaced with the current date. |
| %TIME% | is replaced with the current time. |
| %DATABASE% | is replaced with the name of the family register. |
| %PAGE% | is replaced with the page number. |
| %TOTAL_PAGES% | is replaced with the total number of pages. |
| %USER% | is replaced with the computer user. |
| %USER_HOME% | is replaced with the user's home folder. |
| %APP_NAME% | is replaced with "Genney". |
| %CATCHWORD% | are replaced with catch word. |
| %AUTHOR_NAME% | is replaced with your name you specified for details about yourself. |
| %AUTHOR_EMAIL% | is replaced with your e-mail address you have entered in the information about yourself. |
| %AUTHOR_PHONE% | is replaced with your telephone number you have entered in the information about yourself. |
| %AUTHOR_ADDRESS% | is replaced with your address information. |
Register determines the registers to be displayed; Person names, Places and/or Source reference. For Person names and Places, you can also change the way they are presented through the Advanced button.
Rtf where you can choose whether to scale images in the document. Scaled images provide smaller file size but lower image quality.
Information about myself manage your contact information and how and if it should appear in print. You can choose whether to display it after the title or at the end of the document.
Pdf change settings for pdf printing made with the pdf print made with Genneys pdf printer. Pdf prints made with other drivers are not affected.
Pdf printouts that are not reports use the last saved templates pdf settings.
© Genney